
Beauty of Indian Block Printing
The process of block printing involves pressing and
stamping fabric using carved wooden blocks that are
filled with color. In block printing, a wooden block is
carved to create a design, and the negative spaces are
removed, leaving the positive spaces to be filled with
color. The ink or dye is then applied to the block, and
the design is pressed onto the fabric.

I recently had the opportunity to try out block printing
in the Textile department of Kerala Institute of Design.
These are my initial attempts into the art of block printing,
and I must say, it's been an incredible experience. The
process itself is absolutely fascinating, and I have found
myself enjoying every aspect of it. Hope you enjoy it too.

To begin, we laid our white fabric flat on the table.
Occasionally, the fabric needs to be ironed beforehand to prevent any creases.
Then, we gathered the necessary materials to create the ink for the block printing process.

Now comes the fun part!
Finding the blocks for printing.

Wooden blocks that are carved by hand are the foundation
of block printing. Carving these blocks is a difficult and
time-consuming process that requires a high level of skill.
This skill is often passed down from generation to generation,
with wood carvers dedicating their lives to mastering the craft
and teaching others how to carve blocks.
Look at this beautiful block pieces!

Next, we make color paste for block printing.
This paste contains pigment color, binder, and fixer.
When we print with the paste, the water in the printed area
evaporates during drying. This leaves behind the pigment
color, and binder in the design on the fabric.
To prepare the dye pad, we use a rectangular wooden tray
with a metal frame wound with nylon rope. Coarse sacking
material is layered on top of the rope, followed by finer fabrics
like silk, chiffon, or voile, depending on the required dye
saturation. Finally, we pour the dye onto the fabric
layers, even out the surface, and begin printing.


The placement of the blocks is crucial for block printing on fabric.
Artisans print the outline of the design before using any
color blocks. Block then dipped into the dye pad and carefully
place it on the fabric, striking it with the heel of their hand.

Printing starts from the outside, with the border
printed first and then moving towards the main design.
And there you have it, the process is complete!

Wood block prints are left to dry and then washed.
Careful washing is important to avoid ruining the design.
The finishing process includes ironing, stitching, and quality checks.


I made this piece first and couldn't resist making another.
For the second piece, we followed the same process,
beginning by laying the ironed fabric flat on the table,
measuring and marking for the border and selecting
the carved blocks.


The following step involves creating a color paste for block printing,
which consists of pigment color, binder, and fixer.
Certain blocks are carved to in such a way to put
multiple colors on the same motif on the fabric.
These blocks are carved slightly different from others.
For instance, the peacock motif in this fabric requires
multiple similar blocks to fill the colors inside it. However,
for this specific piece, only one of those blocks was used.
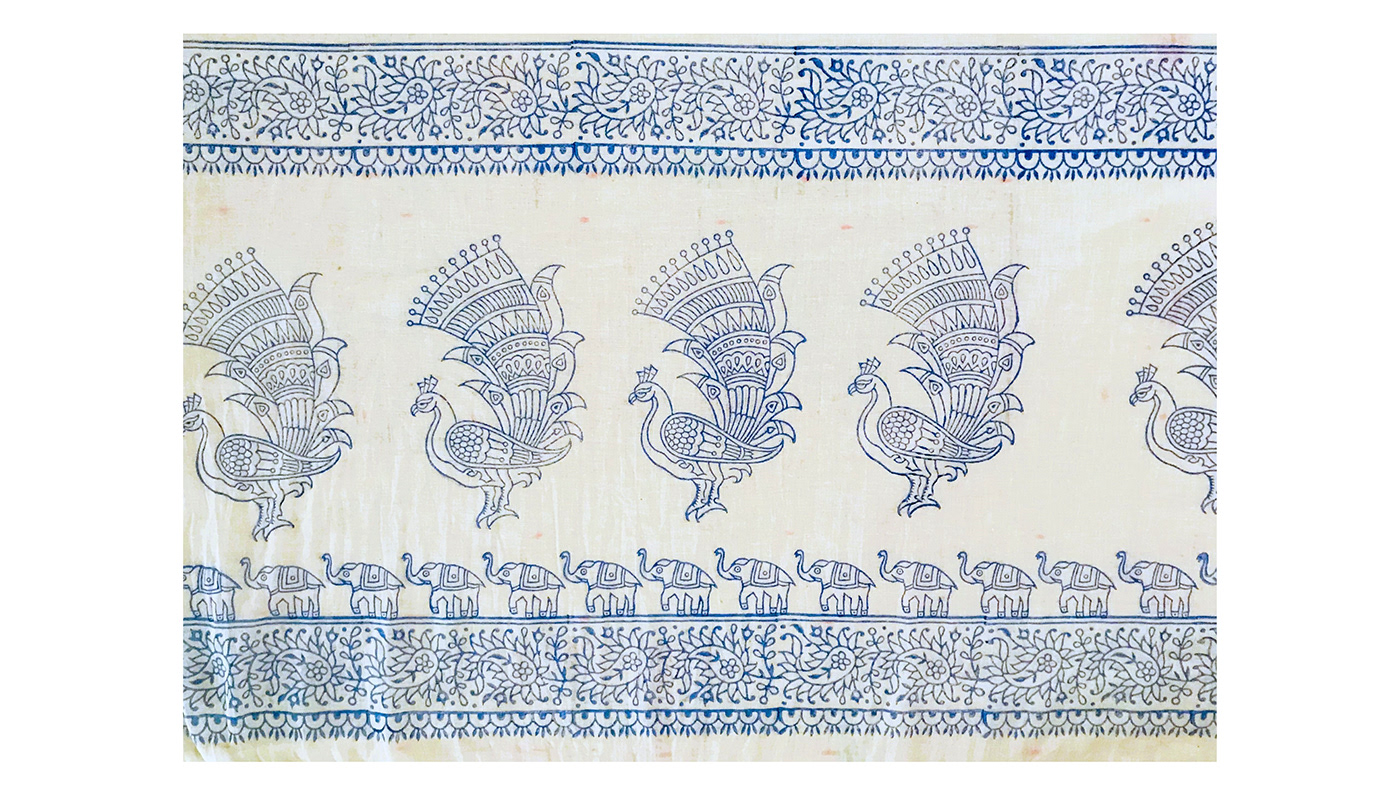
To create the patterns in the fabric,
the remaining space was filled with the elephant design block.


And we now have another beautiful fabric piece.


Many thanks to the Textile department at the Kerala Institute of Design
for giving me the opportunity to learn this wonderful art form.


